Friday, December 30, 2011
Hello 2012
Thank you to everyone who has made 2011 wonderful. A big shout out to my family who are helping me get ready fro my wedding in 2012. Also thanks to my international buddies who read this blog and use it to stay in touch. Hoping everyones wishes come true next year.
Wednesday, December 28, 2011
Choc-A-Holic Cookies
So I really wanted to bake yesterday. I have these cool new cookie cutters that I was going to use. Then I stumbled across 2 choc cookie recipes and decided to try a mutated version of both. These are the most chocolate tasting, fudge like centred cookies I have ever had. I made 24 only 6 survived the night. Those 6 may not survive this post...just saying.
Choc-A-Holic Cookies
Ingredients
3/4 cup (firmly packed) brown sugar
1 cup white sugar
200g butter, softened
1 teaspoon vanilla extract
2 eggs
1 3/4 cups plain flour
1 cup Bournville Cadbury cocoa (any nice Cocoa would work I guess, let me know)
1 teaspoon baking powder
200g choc chip (milk, dark, white or combination it is your choice- I used milk)
Method
1. Preheat oven to 180°C.
2. Using an electric mixer, beat sugars, butter and vanilla until fluffy.
3. Add eggs, one at a time, beating after each.
4, Sift flour, cocoa, baking powder and 1 teaspoon salt over.
5. Add chocolate chips.
6. Stir to combine.
7. Place 1/2 tablespoonfuls of mixture into ball like shapes on lined baking tray. Flatten with a spoon.
8. Bake for 8-10 minutes (vary cooking time for size).
9. Cool biscuits on trays.
Note: Eat when warm soooooo good! I would recommend to watch the oven when you are cooking this because I made tablespoon sized ones and had to have them in for 17 mins. Pictures to come.
Friday, December 23, 2011
Christmas Light Hunting-Innisfail
Aussie Christmas lights. Santa and his sleigh being pulled by mighty Roos'
House 1 of 3, they all went in a row. It was beautiful, I loved the jumping reeindeer.
House 2 of 3, the swinging santa was cute.
House 3 of 3. The flying doves and angels looked beautiful.
All three combined made a magical site.
For those not in Australia, yes we are in the middle of summer which is why you can see the green grass, trees, bushes and flowers. It was cooler last night, only 32 degrees. It was nice for a change.
Rainforest Touches The Sea
Cassowary- Etty Bay
I have headed home and what do you know? Head down to Etty Bay and a Cassowary was waiting to greet us. I got a few photos and video which I thought I would upload. The bird is beautiful to watch. Sorry for the shaky hands.
Monday, December 19, 2011
Mmmm Pumpkin and Cherry Pie
Hello blogging world. Well I have had my last day for the year at my second job. To celebrate I brought in Christmas presents and pies for everyone. I used the wonderful Cherry Pie recipe I got from mathaholic on swapbot and also a pumpkin pie. I am lucky to have Steve send me the pumpkin pie spices from America which make it a little easier to make. So here is the Cherry Pie recipe from mathaholic.
Cherry Pie
Ingredients
2 sheets of short crust pastry (for pie crust)
4 cups of tin cherries pitted-in America Tart Cherries (I use the black ones from Coles)
1 1/2 cups of sugar
4 tbsp cornstarch
1 1/2 tbsp butter
Method
1. Put cherries in medium saucepan over medium heat. Once it get soupy, remove from heat.
2. Pour sugar and cornstarch over cherries, mix well.
3. Put back on heat and cook on low until thick, stirring often.
4. Let it cool.
5. Prep crust and pour cooled cherries into pie.
6. Make a lattice work pie top.
7. Sprinkle with sugar
8. Bake in 375F oven for 50mins.
9.Let cool before serving.
Yummy, wish I had kept some at home :(
Sunday, December 18, 2011
Shout Out to LittleMessyMissy
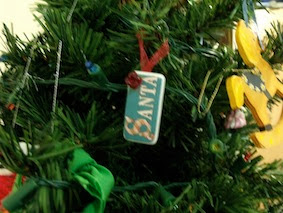
I received a truly amazing swap from LittleMessyMissy on swapbot. She made me 4 beautiful altered dominos for the Christmas Ornament. Hand made/Altered swap. They are proudly hanging on my Christmas Tree. A truly amazing swapper.
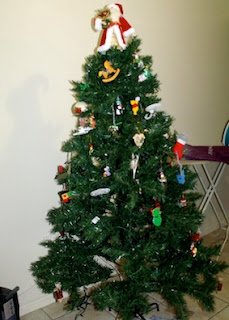
Feels Like Christmas
We have had our tree up all this week and I am only now getting around to posting pictures of our random, random tree. Decorations range from hand sewn treasures to traditional angels, Santa, words of hope, My Little Pony and Star Trek. When Scott's family visited they brought all his decorations from when he was a child. They have a tradition where each year they were given one decoration each with their name and date. Some of these decorations are older than me. Latest additions include a Winnie the Pooh and a Playful Kitten from Hallmark Collection. I present, our tree.
Tuesday, December 13, 2011
Little Birdie Crafting
So the last Swapbot swap I was in required us to make a 2 little birdies for our partners. My two sets are below.
However, this got me thinking. I had a secret santa to do with a very small dollar limit, so I got hold of some nice Christmas fabric and made up a set of these birdies in Christmas Tree ornaments. My secret santa person loved them. Here are the 3 pairs put altogether in their 'nest' (a nice lightweight summer scarf).
Sunday, December 11, 2011
I Feel Like Chicken Tonight!
However, unlike that annoying ad I will not be using a bottle mix. I want to try a new marinade I have had stored up for a rainy day. On that note my goodness the heat is oppressive after the summer storms last night. Air con is actually on before noon (I know I am weak) and this is coming from someone who did not have it until university. How did I survive North QLD as a kid.
I have just finished making this one up using dried herbs, will try with fresh herbs next time to see the difference. Scott should like it because garlic and chilli are his favourite. For dinner tonight we are having Marinated Chicken, Mashed Potato and Salad. Nothing fancy but good.
The marinade recipe is as follows.
Ingredients:
1/4 cup olive oil
1/2 bunch parsley, leaves chopped
2 cloves of garlic, crushed
1 pinch dried chilli flakes (or more to taste)
1/4 cup lemon juice
1 pinch dried oregano
4 chicken breast/thighs
Method
1. Rub over chicken and store in fridge for minimum 30 mins. (I prefer overnight for the flavour to absorb).
2. Remove from fridge 20 mins before cooking.
3. Pan fry ir BBQ chicken.
I will let you know how it goes tonight. If you have a go tell me what you think.
Thursday, December 1, 2011
I LIVE!!!
Hello blogging world,
You may have noticed I have not written in a while (well for me that is). I have been quite ill but am recovering. It has been a very busy time while I have been ill with many exciting things happening. A few new things to report. My wedding invites have arrived!!! From the lovely people at Orchard and Brown. Scott and I are both very excited about this.
School related stuff first. We have been very busy in the classroom organising a number of events. The first was some Christmas relief for a troops and canine units serving internationally. We have managed to get students to write Christmas cards and create care packages to send to our men and women currently serving. The kids (and I) got right into it. I sent to the Canine Units with 2 sets of dog treats and packets to Aussie Mix lollies for the handlers. I hope it reminds them of home.
The next thing we decided to do was make bags with our whole class using recycled materials (fits in with all the sustainability we have been doing all year). I was allocated by my class a set amount of materials and had to create a bag in 1 hour that met the design brief given. It was expected to be to an A standard. I was admittedly nervous. But here is the finished product. Pretty good for the first time I ever made a bag (not to mention not allowed to use a pattern).
Finally Swapbot news. Because of my illness I actually fell a little behind. The last time that happened was when mother nature decided to drop Cyclone Yasi on us. That was certainly an experience. But, I have some wonderful partners who I managed to stay in contact with and gave me a few extra days to complete my projects. Shaking hands make hand sewing difficult. But here is my final product for the Handmade/Altered Christmas Decoration Swap. A door hanging decoration of Chris the Christmas Mouse although I will not be suprised if he is given a new name.
Tuesday, November 15, 2011
Banana Muffin Addiction
Here is my plan. Just go with it okay. I have 3 bananas left from my bunch the parents brought down for me from the farms North of here. I am so excited because they are almost perfect for making Banana Muffins, I am so excited!!! I want to make them tonight but I am half way through making my previous fritter recipe for staff lunch tomorrow. Here is the recipe I use I got it from one of my aunties. If I don't get it done tonight it will have to be tomorrow.
Banana Muffins
Ingredients
- 2 1/2 cups self raising flour
- 3/4 cup of brown sugar
-1 cup of milk
-1 egg
-2 tbsp butter
-1 tsp vanilla essence
- 2-3 bananas mashed
Method:
1. Preheat oven to 180 degrees, prepare muffin tray.
2. Combine milk, egg, butter, vanilla and bananas blend in a metal bowel.
3. Add flour and sugar and mix well.
4. Put mixture into muffin tray
5. Bake for 20-25 mins or until golden
6. Serve warm with butter or eat cold.
Monday, November 14, 2011
Wedding Invites!
So exciting, just heard word from the people over at Orchard and Brown. Our wedding invites are getting printed this week. Can't wait to see them all finished. They have been excellent to work with. The proofs and adjustments have been done beautifully and makes us both feel super special. If you need invites for anything check them out (here is the wedding section broken up into categories depending upon style), they are based in Sydney.
They also have an Etsy Store that covers weddings, children parties and baby showers. Here are some pictures of my favs.
Saturday, November 12, 2011
Crafting Update
Had three crafting projects I was throughly enjoying...until my cute little kitten Delenn got into my bag. Can't salvage any of them for swapping. Will try to save later for my own home. Not a happy camper :(
Fritta Pictures
I have had a few emails about the recipe I posted. Here are some pics to clarify.
Step 3: Put all ingredients into a bowl and mix together.
Step 4: Pour into tine lined with baking paper. Push in grape/cherry tomatoes
Final Product: After cooking for 25 mins
Step 3: Put all ingredients into a bowl and mix together.
Step 4: Pour into tine lined with baking paper. Push in grape/cherry tomatoes
Final Product: After cooking for 25 mins
Thursday, November 10, 2011
Love a Good Fritta
So I have been running on no sleep and zero spare time thanks to my job consuming all. However, this has lead me to be inventive in the kitchen. What do you do when you get home, it is already 7:30pm and you have about 4 hours of marking to do. Opps...forgot about dinner. Look in fridge. Find eggs, basic vegetables and a few rashes of bacon.
FRITTA TIME!
This is a recipe I found online and have adjusted to suit me. It is quick easy and tasty yummy the next day for breakfast and lunch. It is also healthy. Have a go and tell me what you think.
Baked Tomato, Zucchini and Bacon Fritter
Serves: 4
Prep Time: 30 mins
Ingredients
5-6 large eggs lightly beaten
1 onion diced
4 bacon rashes diced
1 sml zucchini grated
1 carrot grated
2 tblsp self raising flour
2 tblsp milk
Clove of garlic crushed
Salt
Black pepper
1/3 cup grated tasty cheese
8 grape tomatoes halved (cherry tomatoes would work)
Method
1. Preheat oven to 175°C. Line a 16 x 26cm baking pan with non-stick baking paper.
2. Pan fry bacon and onion
3. Place the eggs in a large bowl and add the onion, bacon, garlic, zucchini, carrot, flour, milk, salt, pepper and half of the cheese. Stir until well combined.
4.Pour the mixture into the prepared pan. Arrange tomato halves on top, pressing into the mixture slightly (i make random patterns like smilie faces or Pacman). Sprinkle with remaining cheese.
5. Cook for 20-25 mins and serve warm.
6. Put left overs in fridge in a air tight container and eat next day warm or cold.
I may have been very hugrey and didn't get a chance to photograph this one, sorry guys.
Sunday, November 6, 2011
Random Weekend
Like the heading suggests...random weekend. Alright exciting news, I picked up my wedding ring. YAY! I love it and it looks great on my child like hands. I also have learned that working two jobs sucks especially around report writing time and on top of that planning a wedding means no sleep for me. Sadly no exciting cooking or crafting this week. To busy trying to work out this national curriculum and getting through my 20 hour professional development I need to do in my own time (sleep????)
On a random side note. We have a Cockatoo in the neighbourhood who has decided I am a good perch. Scott and I put out wild bird seed so we can get a free show each morning. See this post about some of our visitors. However, lately each time I have gone to put food out a 'wild' (I use the term loosely) Sulphur Crested Cockatoo either lands on the fence right next me, lands on the bird feeder as I am filling it OR on me. This scared me half to death the first time. Especially because I was wearing shiny earrings and just had a mental image of one being ripped out. It keeps doing it and I don't know why it thinks landing on a human is a good idea???? For those who don't know this type of cockatoo weighs about 900g and is 50cm long. It is not small animal to have chilling on you. I am hoping it either stops or I learn to get used to it. I have started talking to it. Perhaps it was a tame one that escaped who knows. I shall call it Bob.
Tuesday, November 1, 2011
Pointy End of Term 4.
Saturday, October 29, 2011
Happy Halloween!
Friday, October 28, 2011
Skelebones Ghost Tour Adventure
Righto, made up a second Skelebones for a birthday. She loved him. So much so that for her birthday celebrations we did a birthday tour and brought Skelebones (his new name) with us. Above we are all chillin' before the tour. Myself (in silver), our ghoulish tour guide, birthday girl-holding the slightly scared Skelebones and finally our never speaking door man. It was a great night with a beautiful meal and drinks at the Yongala Lodge. Skelebones needed some liquid courage. We continued through to the upstair section of the restaurant where 2 or more spirits were supposed to be. Armed with EMF detectors (mine kept going off randomly and it seemed to freak a few of our new found buddies out) we checked out the rooms. Heard the back story of how the Yongala was built and stories of sightings on the verandas and in the rooms. We were also warned not to be last down the stairs or we may get a little help...guess who went last down the stairs. No I can not explain it, yes I did get a little help. Creeped me out.
Next, we were off to the West End Cemetery and heard the many stories of sightings from the little girl called Alice to the lady with the black cat. From their we went to the old convent in a building where the current tenant lives out of only one downstairs room. The rest of the old massive 2 storey house he refuses to go in. As we travelled upstairs we found all the bits a pieces that people have left behind over the past 40 years. Clothes, furniture, toys and even companies paperwork. You can see Skelebones sitting in the old 'prayer room' and holding the EMF on the green chair where a nun apparently sits.
To finish off the tour we went to the old morgue and hospital sights which was creepy. But heard the stories my aunties used to tell me from when they worked on both sights. When I was a kid I thought they were making it up. But, pretty much the tour guide said the exact same thing they did. It was a fun night overall and Skelebones enjoyed his adventure.
Sunday, October 23, 2011
Slow Cooker Satay Chicken
Finally found a 'Peanut Satay Chicken' Recipe that I can do an tastes amazing. For those who don't know, I LOVE my slow cooker. Chuck food in, mix it around and a few hours later amazing yumminess. This is the first time I have done this recipe and I love it, even Scott has asked that I make it again this week. So here is my new discovery.
Satay Chicken
Serves: 4-6
Cook Time: 3 hours
Ingredients
- 1 kg of chicken breast or thigh
- 2 cloves of garlic
- 2 heaped tbsp smooth peanut butter
- 5 tsp soy sauce
- 1 tbsp Worcestershire Sauce
- 1 tbsp tomato sauce (ketchup)- 1 tbsp sweet chilli sauce
- 3/4 cup of coconut milk
- 3 tsp cornflour (optional)
- steamed rice and seasonal vegetables to serve *
Method
1. Remove any fat from chicken and cut into strips. Peel and crush garlic. Place in slow cooker with the peanut butter, soy suce, Worcestershire sauce, tomato sauce, sweet chilli sauce and coconut milk. Stir and combine.
2. Place lid on slow cooker and cook for 3 hours on High.
3. If necessary, mix cornflour with about 2 tbsp of cold water until paste like. Stir through mixture to thicken sauce. Add salt and pepper to taste.
4. Serve with steamed rice and seasonal vegetables.
*1 hour before serving I added celery, carrot, zucchini and shallots to mixture to let the veggies cook in the sauce. They tasted great.
If you do try this tell me how it goes. I have it all packaged up ready for lunch tomorrow at work :) Happy cooking all.
P.S. Sorry there is no picture of what it looks like. It is just after smelling that for 3 hours I was STARVING
Friday, October 21, 2011
Sneak Peak
Working on a few crating projects for swaps at the moment. The bird sewing project should be a lovely afternoon of hand sewing. The other will take a little longer and be a little more fiddly. But, it is still exciting to be crafting again. Here is a sneak peek at what the projects looks like.
Monday, October 17, 2011
YYYIIIPPPPPPEEEEE!
My Swapbot products arrived today. Rachel has kindly sent a package to people who donated to her charity run. It was so exciting to see all these cute little buttons, stickers and pc's. I managed to squeeze all the buttons onto my work bag :) I love Ernie the Envelope, he is SOOOO cute. Anyways, here are the PC's I am getting ready to trade. All so exciting! Just had to share.
Subscribe to:
Posts (Atom)